Record project hours
This is how working times are booked to projects in the web app.
Employees usually record via the mobile app. Project managers, supervisors and admins use either the web app or the mobile app. More on the app: Mobile App.
Views
Reports can be recorded in all four views:
| View | Recording via double click or drag and drop |
|---|---|
| Day view | Hour basis |
| Week and month view | Day basis |
| Year view | Week basis |
New entry
-
Choose the desired day/period.
-
Double click on the time field or mark a period via drag and drop.
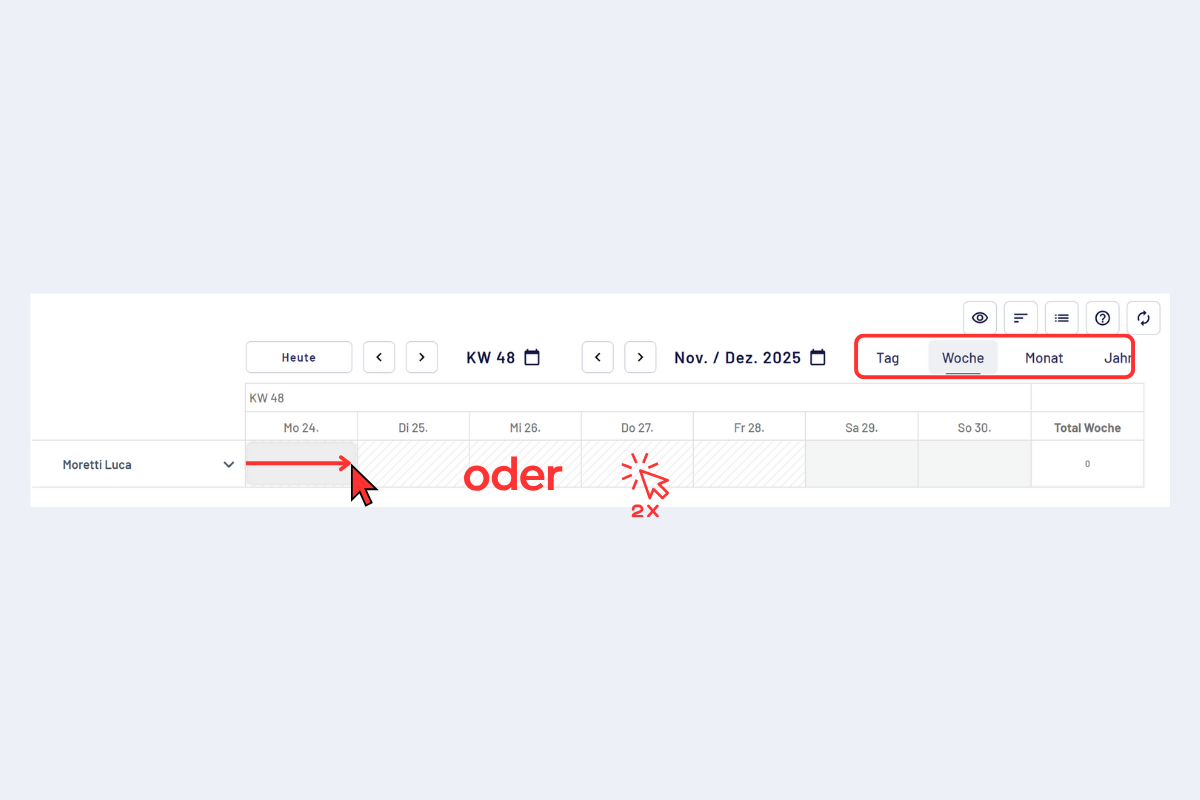
Record project hours, double click or mark a period
-
Choose project (favorites help with quickly finding it).
- Search: filter by project number or name.
- Selection: double click on the project or single click and "Next".
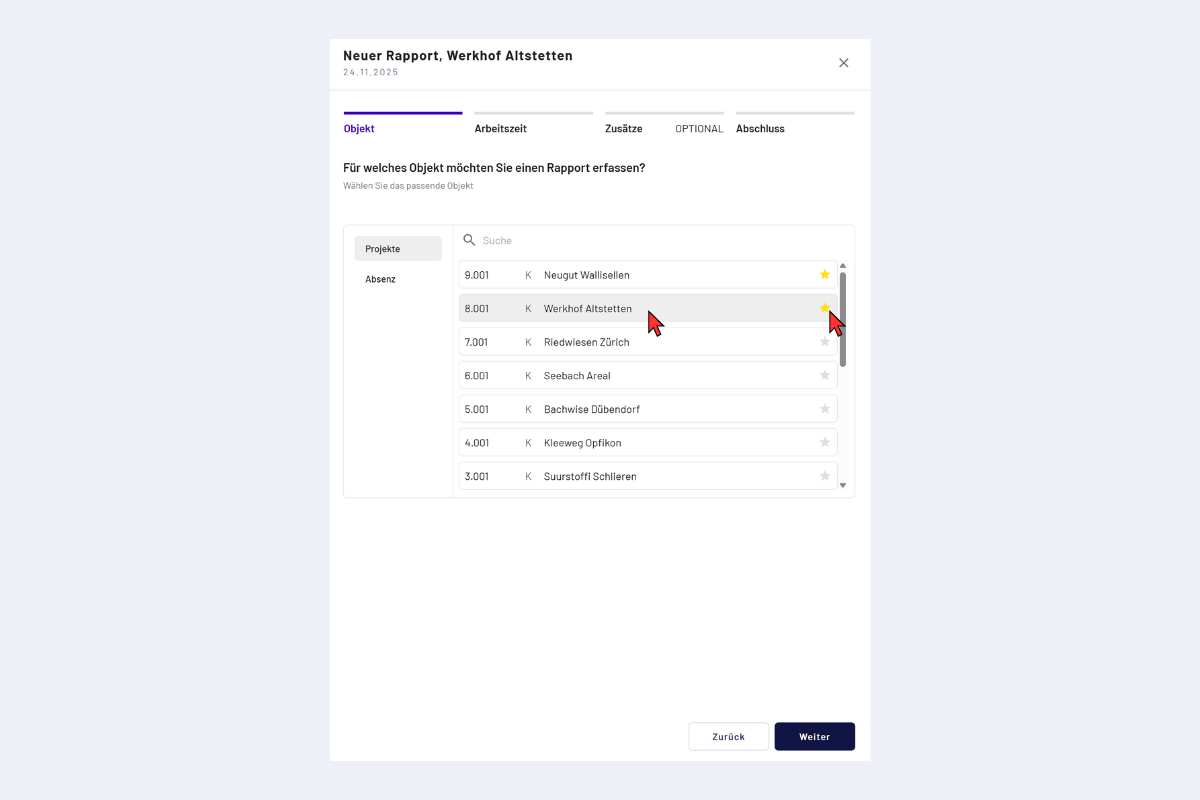
Choose project and set favorites
Favorites save timeFavorites appear at the top in the future. They are employee-specific: in "My reports" you see your own favorites; when booking for another person, that person's favorites are shown. More: FAQ.
-
Enter working time (from–to or duration).
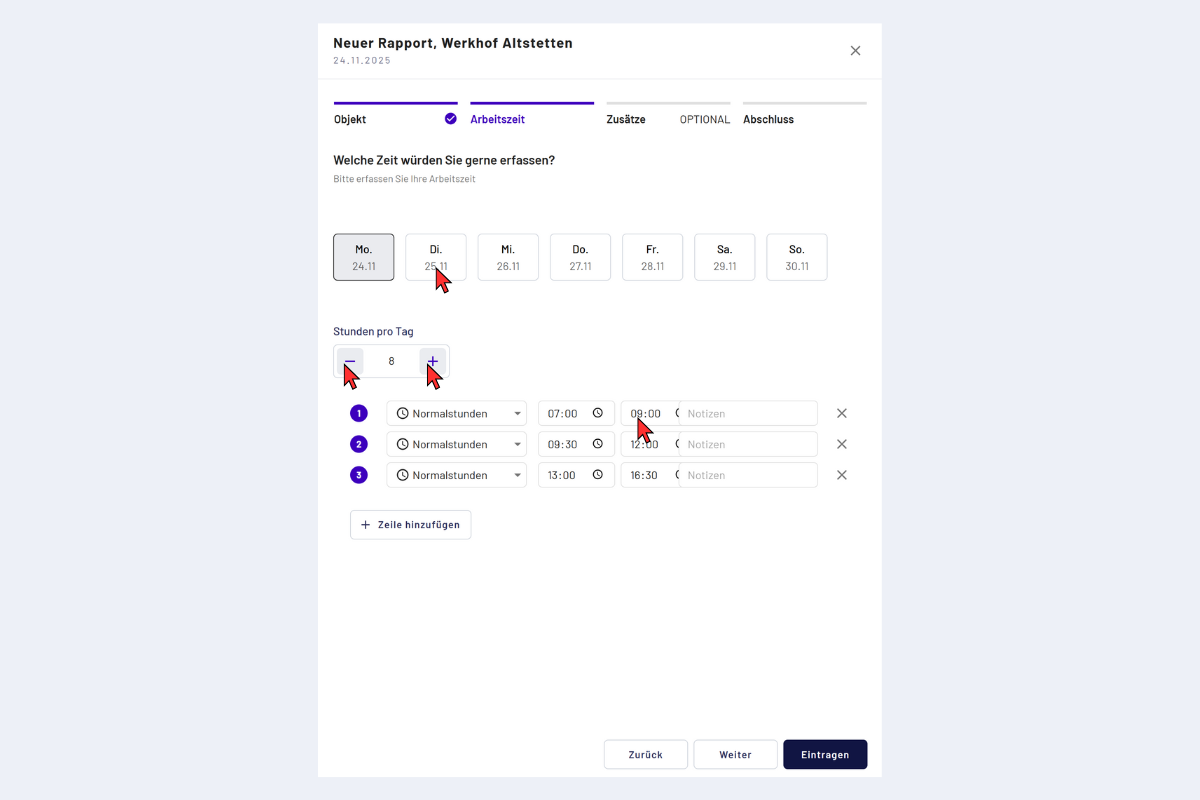
Enter working time
- Book a single day or mark several days at once.
- "+" adds time at the end, "–" subtracts time at the end. Alternatively, edit the from–to times directly in the rows.
- Any number of rows per day (e.g. for breaks).
- Optionally a note per time block.
- Hour types: regular hours, travel time or additional hours. Travel time and additional hours currently do not count toward the target hours, do not flow into the hour total in the overview and are reported separately. Details: Regular hours, travel time and additional hours.
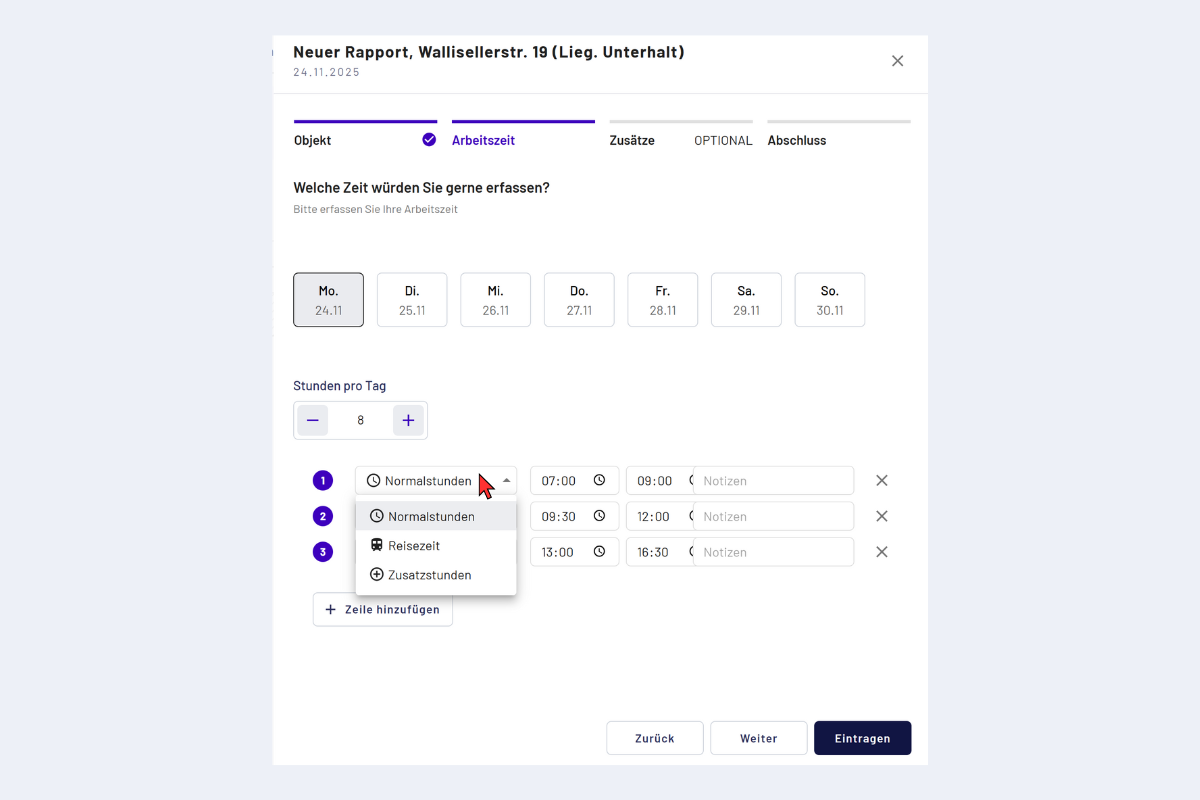
Record project hours, hour types
Total in the overviewIf the entry is to appear in the hour total of the overview, it currently has to be recorded as regular hours. This behavior is a deliberate, currently valid configuration and may change in the future.
-
With "Next" continue to the additions step, or save directly with "Enter".
Add additions
In the last step, additions can be recorded:
- Automatic additions: apply when conditions are stored and "Apply automatically" is active.
- Manual additions: choose the matching addition from the dropdown and enter values.
Example: Private vehicle KM. The input value is the number of kilometers driven. The stored rate automatically calculates the franc amount.
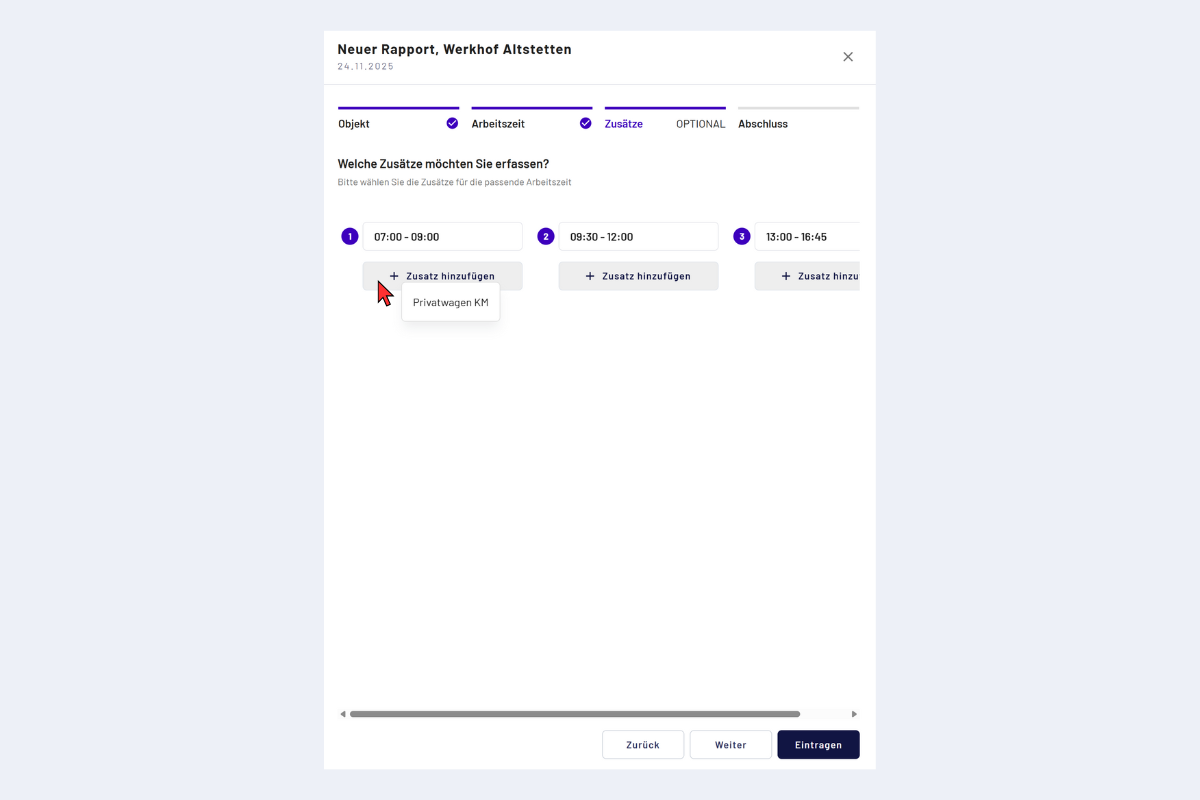
Choose an addition
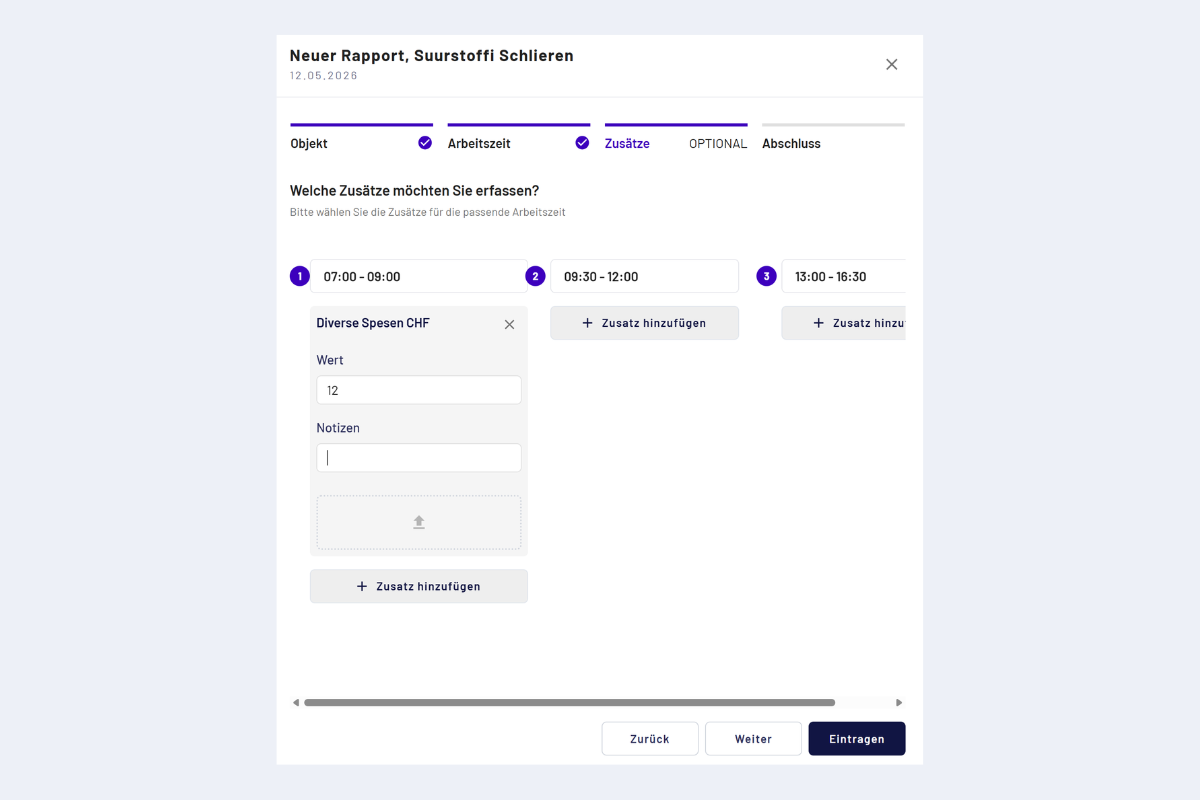
Record an addition, input value and calculation
Custom additions cannot be created here, only the types preconfigured by the admin are available for selection. Employee overview of all add-on types (including general additions like the lunch allowance): Add additions and expenses. Admin configuration: Additions and supplements.
Status and forwarding
When saved, the entry has the status "Planned" (gray). From there:
- Planned (gray): can be adjusted or deleted at any time.
- Forward: sends the entry to the next approval stage, the status becomes "Reported" (yellow) and is no longer editable.
- Rejection: the entry comes back and is editable again. Alternatively, the supervisor or project manager reopens the week.
- Close the week only when all entries are complete. After that they can no longer be edited.
Individual entries can only be forwarded in the day view. This is relevant when only individual days have been reported and need to be passed on before the week closure. In the week view there is no longer a forward action; instead, general additions can be viewed there (with the appropriate permission also added or edited) and the week can be closed.
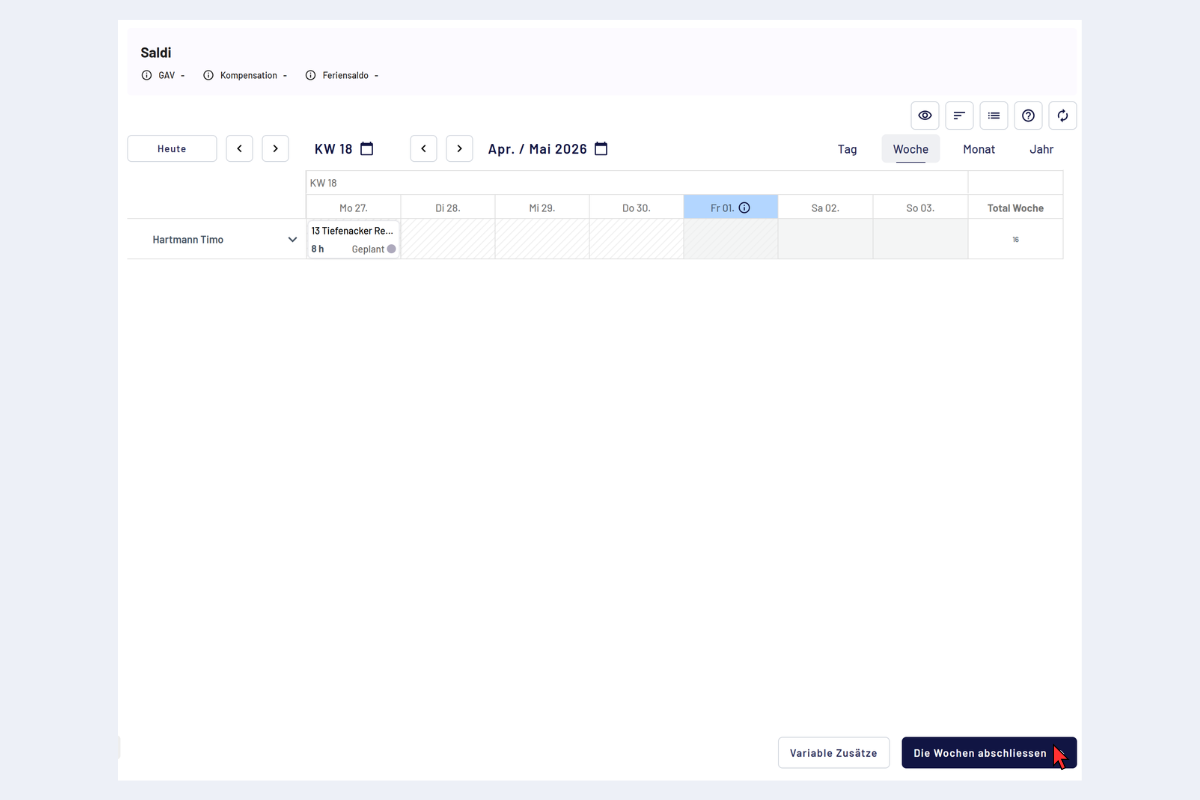
Forward entry
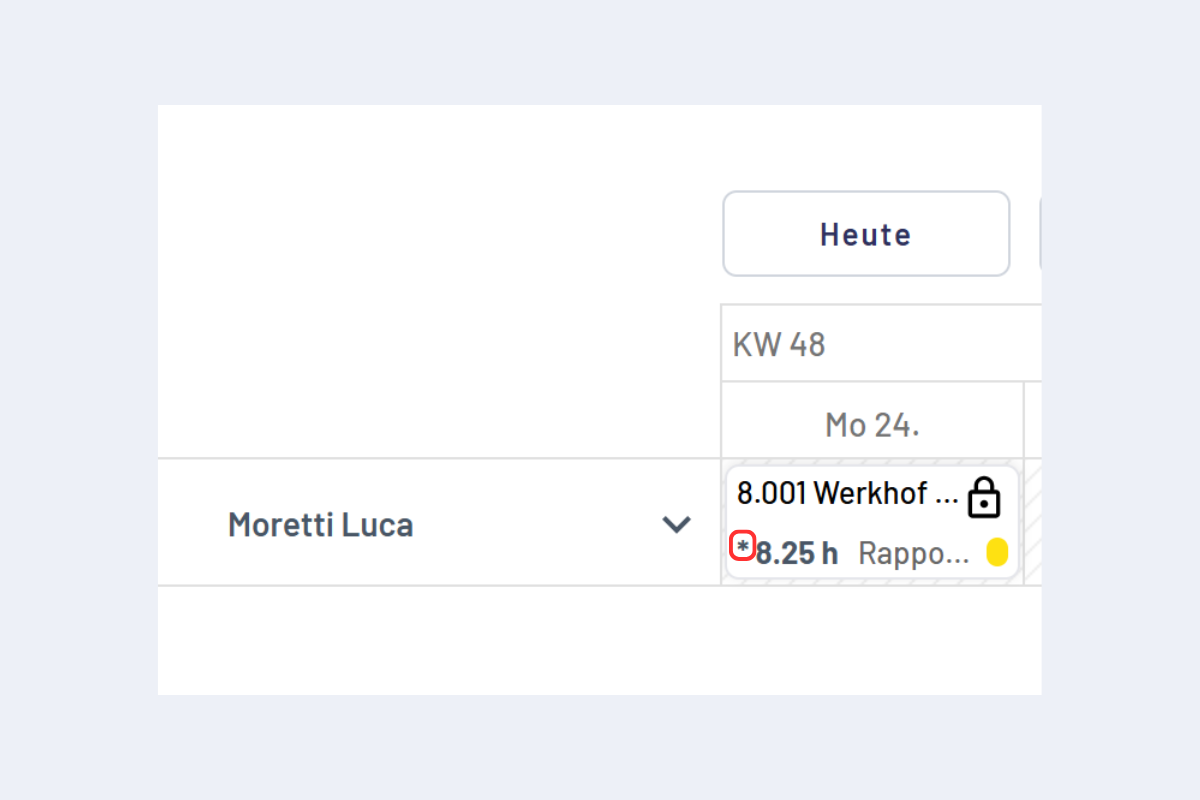
Status "Reported" (yellow, forwarded)
A star in the entry indicates that additions have been recorded (automatically or manually).
Further details: see Rule checks and GAV specifics.